How to install a cooktop
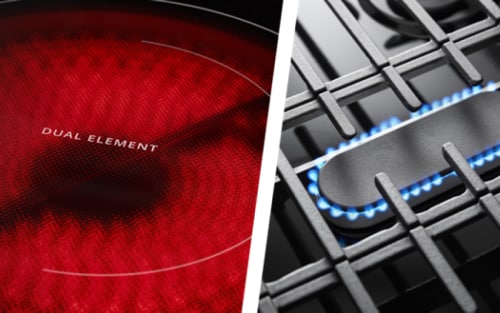
Whether you’re replacing an old cooktop or putting in a new one for the first time, installing a cooktop on your own may seem like a difficult challenge to tackle. Thankfully, with the right tools and instructions, the process may be manageable. You can use this guide to help you through the installation process of gas, electric and induction cooktops, as the basic installation steps are the same for each.
Always consult your product manual for model-specific installation instructions, as this guide serves only as a general outline of the installation process. If you have granite or quartz countertops, the process may vary. Refer to your model-specific installation instructions. You may want to hire professional help if you need to install new gas or electrical wiring for your cooktop.
Before getting started, learn more about sizes with our guide to cooktop dimensions to make sure your new cooktop is the right fit in your kitchen.


Installing a cooktop: step-by-step instructions
When you prepare for your cooktop install, you will need to ask an additional person to assist you. Cooktops are heavy appliances that can be too difficult to lift without an extra pair of hands. In preparation, shut off electrical power from the fuse box and turn off the gas line before you begin. If you do not know how to shut off electrical power and gas, professional assistance is strongly recommended. Installing a new cooktop generally takes between one to two hours, but may take longer if your new model requires a new hole to be cut to fit. Before getting started, learn more about cooktop dimensions here to make sure your new cooktop is the right fit in your kitchen.
Specific instructions for cooktop installation vary depending on the manufacturer. Whirlpool® Induction and Electric Cooktops share installation instructions, while Gas Cooktop instructions also include gas line set up. Keep your product manual on hand during the installation process.
What you’ll need for cooktop installation
A detailed list of the tools you’ll need for installation can be found in your cooktop’s product manual. Below are the general tools and supplies you will need.
Tools:
Tape measure
Flat-blade screwdriver
Philips head screwdriver
Hand or electric drill
Level
Marker or pencil
Pliers or wrench
¼" drill bit
Jigsaw
For gas installation:
15/16" combination wrench
Pipe-joint compound resistant to LP gas
Noncorrosive leak-detection solution
Pipe wrench
Paint brush


Step 1: Disconnect and check the fuel source
Depending on the fuel source your cooktop requires, there are two different processes to follow. If you’re replacing an electric or induction model, the connection and fuel source require a junction box underneath the appliance. If you’re working with a gas cooktop, a gas line is required for connection. Before removing an old cooktop or installing a new one, you must disconnect the fuel source. Your new cooktop will connect the same way as the previous one as long as it has the same fuel source, so be sure to label or photograph the wiring before disconnecting.
Electric or induction cooktop:
- Verify the voltage and amperage of your new cooktop.
You will likely already have a junction box that should be at least 240 volts if you’re replacing an old cooktop.
Amperage may differ between your old and new model. Newer cooktops typically have a 40 or 50-amp circuit, while older models have 30-amp circuits.
If you don’t have the required amperage or voltage, an electrician is recommended for this installation.
Gas cooktop:
- Check for wear in your flexible gas hose. If there is no damage, the same hose can be used for your new cooktop. If damage is found in the hose, replace it.
To shut off the gas, turn the switch perpendicular to the valve. Loosen and remove the flexible gas byline with a wrench.
Step 2: Remove old cooktop
Once electricity has been shut off at the fuse box, ensure that the power is completely off by using a circuit tester on the wires. If the tester light comes on, there is still power that needs to be shut off. After you have tested the wires, be sure you have plenty of room to work on the installation. This may mean removing cabinet doors or drawers that surround the cooktop.
- Remove all detachable parts from the cooktop, such as burner covers, grills and caulking.
- If your cooktop is attached to your countertops with brackets, unscrew and remove brackets to release.
- With the help of one or more people, push the cooktop from the bottom to lift it up and out.
Step 3: Measure countertop opening and check cooktop dimensions
Typically, cooktops require 30 inches and 1-2 foot clearances on each side, but these measurements may vary depending on the model. Refer to your product manual for model-specific dimensions and location requirements. Using your tape measure, verify that your space has the proper clearance for your new model. Measure the appliance and subtract ½ to 1 inch each side to include the overhanging lip that goes over your countertop, and make sure there is plenty of space below for the burners.
Step 4: Remove cooktop and detachable pieces from packaging
Once you’ve prepared the space for your new cooktop, remove the appliance from its packaging and dispose of any protective materials attached. Loose items like grates, burner covers and knobs can be set aside until installation is finished.
Step 5: Install clips and brackets to hold cooktop
Clips attach to your cooktop and snap into brackets installed onto the countertop cut out to hold the appliance in place. Brackets will either be attached by screws or with an adhesive. Clip and bracket installation instructions vary by model and can be found in your product manual.
Step 6: Lower cooktop into place
Using the help of at least one other person, lower the cooktop into place with the back end angled down.
Make sure that the clips on each side of the cooktop line up with the brackets in the cutout.
Push down on the cooktop to snap the clips into the countertop brackets.
Follow product manual for model-specific installation instructions.
Step 7: Connect cooktop to fuel source
This step will vary depending on whether you are connecting a gas or electric cooktop. Be sure to follow your product manual for specific connection instructions. If you do not feel comfortable performing these steps, professional help is recommended.
For electric cooktop:
- Ensure electricity is still powered off at the fuse box before wiring the new cooktop.
Connect the cables to the electrical box using the photos or labels of your old cooktop for reference.
The red and black cables are the positive and negative charges that supply power. The white cable is neutral and the green cable is called the “earth wire.” Make sure to connect cables to their corresponding terminals.
Bind all wires with a cable nut and tuck them within the junction box to avoid short-circuiting.
For gas cooktop:
Apply a generous amount of a pipe-joint compound to the smaller thread ends of the flexible connector adapters using a paintbrush.
If the cooktop came with a regulator, attach the regulator to the cooktop. Then attach the hose to the regulator. Apply pipe-joint compound before tightening the attachment.
Test all gas connections by brushing on an approved noncorrosive leak-detection solution. Once gas is turned on, look for bubbles in the leak-detection solution. If bubbles are found, there is a leak. Correct any leak found by tightening with a wrench.
Plug in to the electrical outlet for the igniter to light the burners.
Step 8: Install trim and removable pieces
Tighten the screws from the clips and brackets to ensure a secure hold. If you’re adding trim, caulk the area. Following the instructions in your product manual, attach knobs, burner covers and grates to your cooktop. Keep your newly installed cooktop looking great by learning how to clean a glass stovetop.


Electric or gas cooktop installation FAQs
Get the answers to some frequently asked questions about cooktop installation before you start your DIY install.
Do you need an electrician to install a cooktop?
If you’re replacing an old cooktop with a new one, an electrician is not required as long as you have the correct voltage and amperage for your new model. Professional help is recommended if you don’t have the voltage and amperage you need. If you are converting from gas to electric or vice versa, professional help may also be required.
Can you replace an electric cooktop with gas?
You can replace an electric cooktop with a gas cooktop with the help of a licensed professional. The voltage required for a gas cooktop differs from electric, so the outlet will have to be changed. A licensed professional will also have to set up a proper gas line that follows building codes.


Can you replace a 30" cooktop with 36"?
It is possible to replace a 30" cooktop with a 36" model if you have the space for it in your kitchen. If the cabinet that holds your old cooktop is 32" or smaller, you will have to do some remodeling of your cabinetry to make room for a larger appliance. This may mean removing at least two cabinets to fit the larger size.
How do you replace a cooktop with granite or quartz countertops?
Since granite and quartz are more difficult materials to cut, you will need professional help if you are installing a larger cooktop than your previous model. Another difference in installation is how you attach the support brackets. Since these countertops are hard and thick, brackets cannot be screwed into them. Instead, the support brackets will be attached using an adhesive specific to granite or quartz.
How much does it cost to install a cooktop?
The average cost of installing a cooktop can typically range between $500 to $1,000 depending on the type of installation and costs in your area. This cost does not include the price of purchasing a new cooktop. Converting from electric to gas is typically a more expensive installation, as is any installation that requires intensive electrical modification.
Shop Whirlpool® Cooktops
Learn more about Whirlpool® Cooking Appliances
-
 Gas vs. Electric Stoves: Which Is Best? Gas stoves offer responsive heat control for quickly adjusting burner power. Electric stoves offer even oven heat, ideal for baking. Compare gas vs. electric stoves.
 -
 Kitchen Island Cooktop or Range: Which Is Best? Installing or updating a kitchen island? Learn about the benefits of a kitchen island with a range or cooktop so you can choose the right option.
 -
 What Is an Induction Cooktop and How Does It Work? Learn more about the benefits of induction cooktops, how to use them and how they differ from other types of cooktops with this comprehensive guide from Whirlpool brand.


home heartbeat
Ready for more tips, home hacks and appliance guides?


